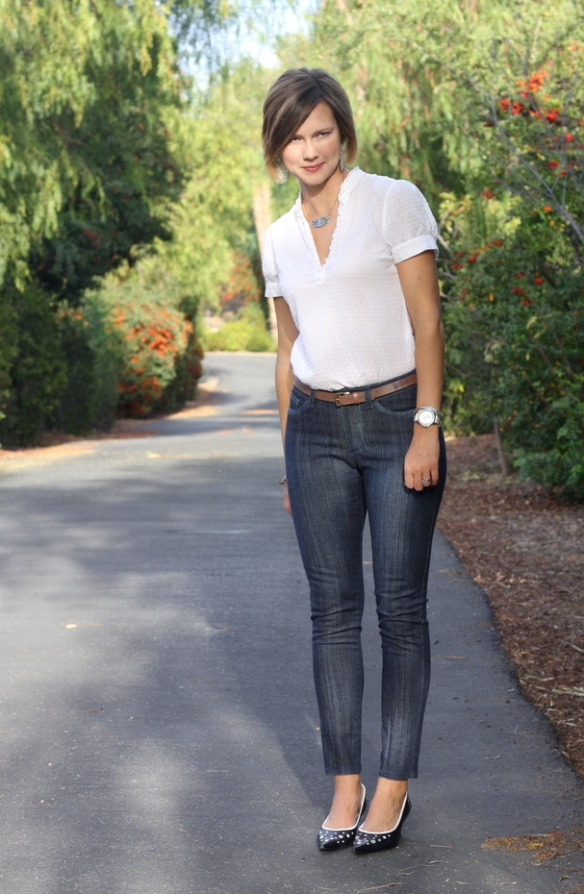
 Of course I still love the Named Jamie jeans pattern, and I wear both my black and ikat pairs often, but I wanted to try making a classic pair of jeans. You know, the traditionally shaped 5 pocket with all the topstitching. I actually quite like to add topstitching to my garments now that I have an edgestitch foot for my Bernina. I wanted something I would wear and wear, not keep “saving” like I do for many of my handmades that are a little too fancy or precious. I wanted a workhorse.
I got to test the Liana Stretch jeans for my friend Kennis of Itch to Stitch patterns. I enjoyed the testing deadline to keep me focused, and I like helping other pattern designers. Kennis does a lot for the pattern design community and she is a very talented designer.
 The coolest thing about this pattern is that it has options for skinny, straight, and bootcut legs. The way she does this is she drafted separate leg pieces that you add to your waist/butt/fly area. This is brilliant! Basically, when you finally get the fit of the tricky butt/crotch curve/hip area perfect in these jeans you will be able to use any leg width you want for a complete jeans wardrobe! So smart, right? I want to try them in all the different shapes and all the different colors…
My review- I love them so far! I included them in my Winter Capsule Wardrobe because they will go with anything. And I recently wore them to Disneyland. I was sitting down, then getting up, walking, skipping, you name it! These were comfortable and cute and BEST OF ALL, no yanking up my pants because they slide down my hips! This is huge for me, guys. Huge. They come up just high enough to stay up, but not so high that I can’t tuck things in. Extremely exciting!
 I also loved Kennis’ fly insertion method. It was easy to follow and resulted in a smooth, nicely finished fly. My best one yet.
Please note that this was the first version of the jeans, and there was a little tweaking of the yoke in the final version, and it ended up looking fab on a lot of different bodies. But, as I’m sure you know, it is very unlikely that you will find a jeans pattern that fits most people out of the box. People are just shaped different! This one fit me so well (no modifications because it was a test) that I am going with this version. I think the new pattern has more room in the bum area, and that is not an adjustment that I need. I have a lack in that arena!
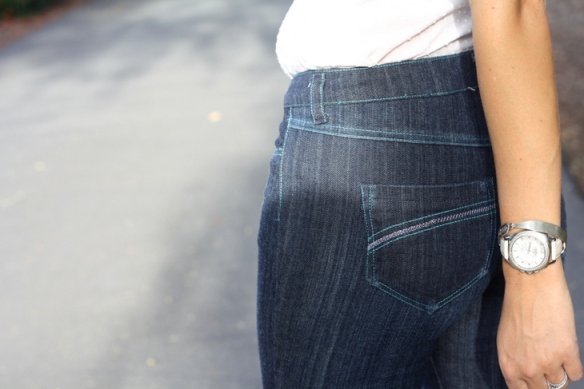
 Can you see that I tried to distress my seam edges and legs? It doesn’t show up on camera, and I will admit that I was a little timid about the whole thing. I might have another sandpaper session down the legs at least after I’ve washed them a couple more times. The distressed sections actually look more blue, so I wonder how the washing will effect the color.
 My back pocket design was a horror of indecision and not getting them mirrored correctly. Ugh. I tried at least 3 different marking methods with limited success. Next time- straight lines I can measure out! But I like my unique choice of topstitching color. It is a little different, but not too wild. They remain classic.
 I didn’t feel I needed rivets in this pair, but I look forward to trying that technique out. This is a first try, but the errors I see are a learning opportunity. I’m so glad I am learning this new skill with such an nice PDF pattern and well written instructions, too. It has been very fun so far!
I asked Kennis if she wanted to extend a discount to my readers, and she agreed that it is a fun idea! Use the code “grayallday” without the quotes at Itch-to-Stitch.com on the Liana Jeans PDF pattern until January 17th, 2016 to get 20% off and start your own jeans wardrobe! I hope I see yours linked up on the Sew it Chic party soon!


 This is just a quick post about these
  I proceeded on to practice my jeans making skills. I do want to make a stable full of handmade jeans, since I can think of no other article of clothing I wear more. So practical for me. So I pressed on, despite the obvious issues. Some might notice that my yoke seams don’t line up at center back. Normally this would be totally unacceptable, but I knew that these babies were going to be “jeggings” in the sense that I would be wearing a longer top over them, due to the thin fabric, so I left it. Ha!
 I practiced my fly insertion, and it went very well again. The wrinkling there is due to my buttonhole being too close to the center. It is a bummer mistake, but I learned from it, so I’m further down the road to total jeans domination.
 It is always a good idea to just baste the pant legs to check fit, since all fabric behaves differently. While I was doing that, I was horrified to see some camel toe action. Ewwww! I almost abandoned them. But since I was practicing, I put on the waistband. I also wanted to see if I should perhaps make fit adjustments to the crotch curve of this pattern before I make 20 more pairs (though my
  So now I’m quite pleased with them. Yes, the fabric is not ideal, but I could certainly wear them half tucked with a longer top so my bottom doesn’t feel totally exposed. And man, they are comfy! Just like leggings, but a tiny bit nicer.
 Here is the new (and FREE)
  Kennis took our tester feedback into account for the instructions, but I do not believe she had to change any of the drafting of this pattern. It was great! The only changes I made were to add a little length (as usual) and I lined the back. I wanted a little extra coverage of my assets in a knit skirt. Depending on the thickness of your knit, it is an easy thing to just cut 2 backs and sew them together in the side seams and into the waistband seam.
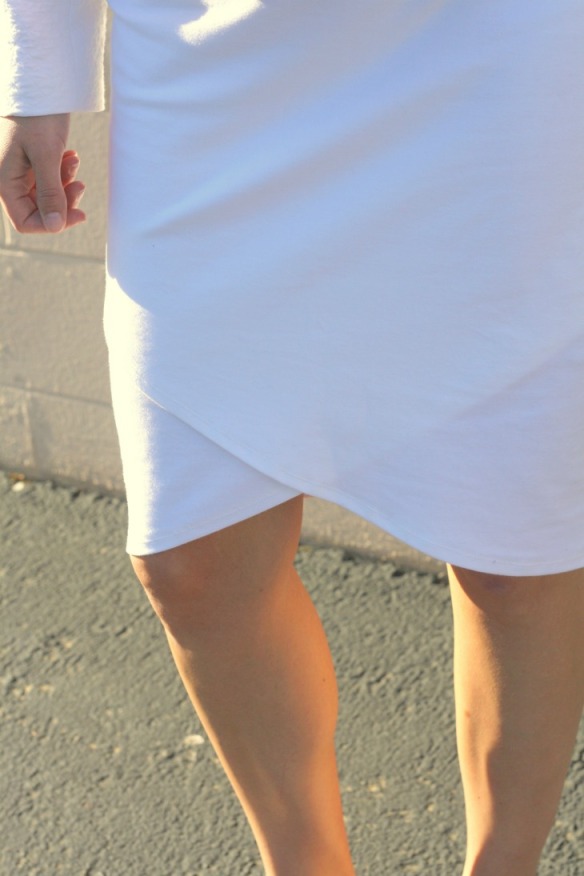 Other construction notes – I serged all the seams and twin needled the hem. I hemmed the back and lining seperately. Actually, come to think about it, I didn’t hem the lining at all. It doesn’t fray and I wanted it smooth. I used a nude tricot for the lining because I unfortunately didn’t have quite enough of the white to self-line. Since you do cut 2 fronts to make it wrap, that means it takes quite a bit of fabric. Get extra if you want to self-line.
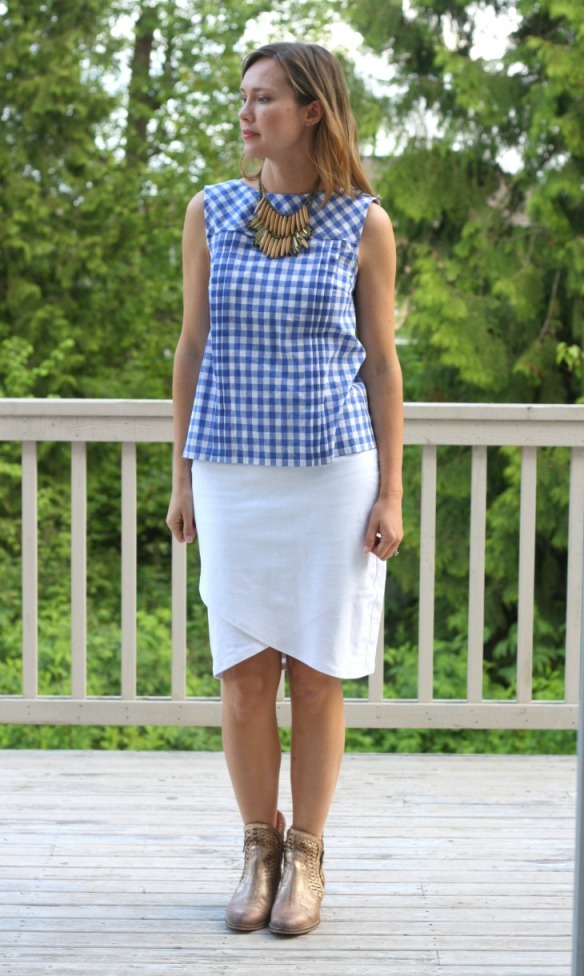 BTW, the voting is now open for the