
 I love the Green Winter Street dress that I made for the Pattern Review Surprise Sewing Bee last year! I feel like a million dollars in it. But, I don’t get to wear it often. It is a bit much for everyday, which is sad. So, I am paying homage to that dress by using the same fabric combo again in this version of the Seamwork magazine Aurora tank. It makes me think of the original dress, and that makes me happy.
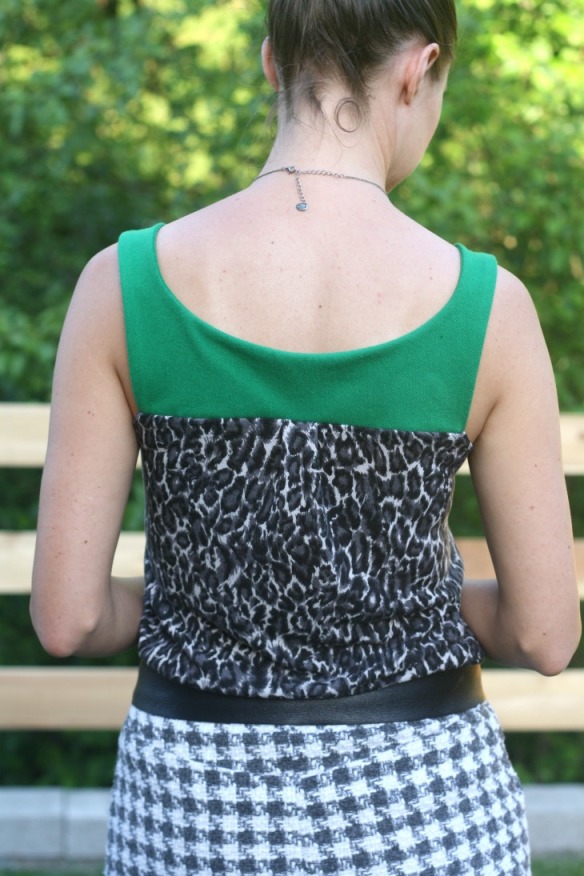 Recap on the fabrics – a french terry-ish knit that was labeled “Juicy Couture” on the remnant table, and the leopard is a very fluid knit that is soft as a baby’s bottom. They are both fabulous fabrics! I wish I had more of both of them, but at least I have used them twice and have enjoyed them thoroughly.
 I made this with the same adjustments as before but scooped out the armhole just a bit and it is now perfect.

Warning – this tutorial is a tricky move on the Aurora tank because of the gathers. If it was just a straight join it would be easy peasy. But there is much fiddling and working with it to get it all lined up and not puckered. I know that is why Colette did not recommend this method when writing the instructions. I’d guess it adds 15 or 20 minutes to the sewing time.


 To join the shoulder straps cleanly, first sew the yoke pieces at the back neck and both armholes, right side to right side, following the pattern instructions. Leave the yoke inside out. Then stick a safety pin into the top of both the front pieces where you have already gathered and finished armhole and neckline edges. Use the safety pin to feed the front straight up into the inside out yoke, keeping the front piece as flat as possible. I recommend threading both through at the same time to ennsure they are both facing right side up and nothing gets twisted.
 When it is up through the top of the each yoke strap, straighten the gathers. Take each side of the gathered piece and carefully place them tightly into the side of the strap opening. smoothing your gathers evenly across, then pin. My pins are crookedly shoving those corners tight against the edges.
Sew straight across the strap, perpendicular to the pins. I don’t trim my edges until I pull it out and see how everything lined up and how my gathers look. If it isn’t perfect you can always try again. Pull the front right out and take a look! It is like magic!

Now the join of the strap and the front are fully enclosed and are not going to flip out or ravel. I used this technique on all my Aurora tanks and I think it is such a nice touch.
Here is the first outfit I tried with my new leopard Aurora tank– I decided the greens didn’t match so I changed, but I love the vibe of the maxi skirt and the top. Maybe I should make a skirt that will match?


Thank you for this. I know what I am doing this weekend! K xXx
You’re welcome!
You should definitely make a matching maxi skirt, it looks really fab!
I’ve been meaning to make a Sewaholic Gabriola skirt.
Nice one – yet again. Do you think the Aurora would work with a drapey woven too? Or would you only recommend making it up in a knit?
Thanks! There is negative ease in the bust, but if you looked at the finished garment measurements you could make a bigger size and make it in a woven. Or just add width across the front piece. It would be cool to try!
Enclosing all the raw edges at the shoulder seam seems like the logical move to me. I think it’s worth the extra time to get a clean finish! Out of curiosity, how does the pattern suggest finishing this area?
Me, too. It is a quick beginner pattern, so it instructs just attaching it right side to right side, so your seam allowance sits against your shoulder. But with the 2 layers of the yoke, you have the opportunity to enclose them, so I say go for it!
Sassy combo. And I love the idea of using left over fabric to make a “casual” version of a special garment.
Thank you for posting the tutorial above! I knew as soon as I read the instructions I wanted to slip the front inside the yoke.
Thank you for your fantastic method of making up the front/back! My first Aurora was not pretty, but the second, based on your advise, was perfect!
Oh that makes me so happy to hear, Michelle! It can be tricky, so I’m glad it turned out! Thank you for letting me know.
This is a very helpful tutorial.
Oh good! I’m glad it is clear!